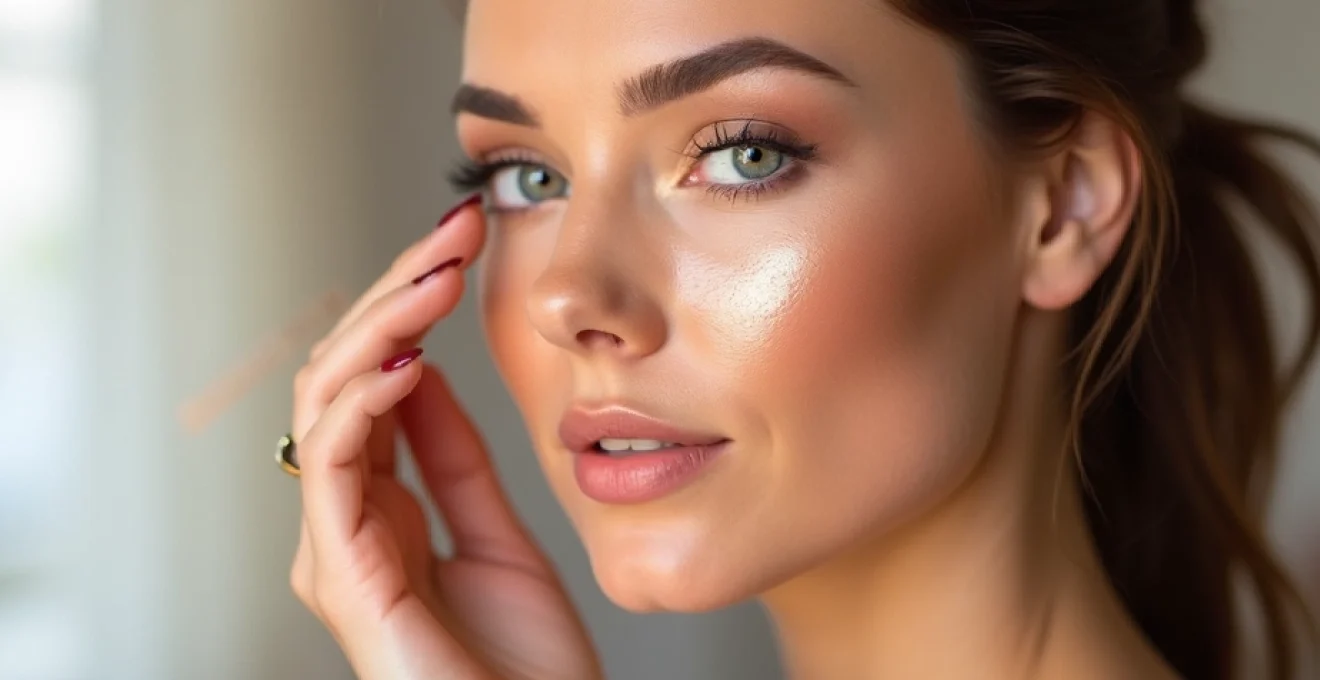
Mastering the art of makeup application can transform your appearance and boost your confidence. Whether you’re a complete novice or looking to refine your skills, understanding the fundamentals of professional makeup techniques is essential. This comprehensive guide will walk you through the essential components of a beginner’s makeup kit, proper skin preparation, foundation application, eye makeup techniques, and more. By following these expert tips and tricks, you’ll be well on your way to achieving flawless, professional-looking makeup results.
Essential makeup kit components for beginners
Building a well-rounded makeup kit is the first step towards creating stunning looks. As a beginner, it’s important to focus on versatile, high-quality products that will serve as the foundation of your makeup routine. Here are the essential items every beginner should have in their makeup kit:
- Primer
- Foundation
- Concealer
- Setting powder
- Blush and bronzer
These basic products will allow you to create a flawless base for any makeup look. As you become more comfortable with application techniques, you can expand your kit to include additional items like highlighters, contouring products, and a variety of eyeshadow palettes.
When selecting products, consider your skin type and tone. For example, if you have oily skin, opt for oil-free or mattifying formulas. If you have dry skin, look for hydrating products that will nourish your skin while providing coverage. It’s also crucial to choose the right shade of foundation and concealer to match your skin tone perfectly.
Skin preparation techniques for flawless application
Proper skin preparation is the key to achieving a flawless makeup application. A well-prepped canvas ensures that your makeup goes on smoothly and lasts longer throughout the day. Let’s explore some essential skin preparation techniques that will elevate your makeup game.
Double cleansing method with micellar water and gel cleanser
The double cleansing method is a game-changer for removing all traces of dirt, oil, and makeup from your skin. Start by using micellar water to remove surface-level impurities and makeup. Follow up with a gentle gel cleanser to deep clean your pores and prepare your skin for the next steps in your routine.
This two-step process ensures that your skin is thoroughly cleansed without stripping it of its natural oils. Clean skin is the perfect canvas for makeup application , allowing products to adhere better and last longer.
Exfoliation using chemical vs. physical exfoliants
Regular exfoliation is crucial for maintaining smooth, radiant skin. There are two main types of exfoliants: chemical and physical. Chemical exfoliants, such as alpha-hydroxy acids (AHAs) and beta-hydroxy acids (BHAs), work by dissolving dead skin cells. Physical exfoliants, like scrubs or brushes, manually remove dead skin cells through gentle abrasion.
For beginners, it’s generally recommended to start with a gentle chemical exfoliant, as physical exfoliants can sometimes be too harsh if not used correctly. Incorporate exfoliation into your routine 1-2 times per week to avoid over-exfoliating, which can lead to skin irritation.
Proper moisturizer and primer application sequence
After cleansing and exfoliating, it’s essential to hydrate and protect your skin before applying makeup. Start by applying a moisturizer suitable for your skin type. Allow the moisturizer to fully absorb into your skin for a few minutes before moving on to primer.
Primer creates a smooth base for makeup application and helps your makeup last longer. Apply a small amount of primer all over your face, focusing on areas where makeup tends to fade or crease, such as the T-zone and under the eyes. The right primer can make a significant difference in the longevity and appearance of your makeup.
Color correcting for various skin concerns
Color correcting is a technique used to neutralize specific skin concerns before applying foundation. Different colored correctors target different issues:
- Green corrects redness
- Purple neutralizes sallow or yellow tones
- Peach or orange conceals dark circles
Apply color correctors sparingly to the areas of concern and blend well. This step can dramatically improve the overall appearance of your foundation and concealer application, especially if you have specific skin concerns you’d like to address.
Foundation and concealer application mastery
Mastering foundation and concealer application is crucial for achieving a flawless base. These products even out your skin tone, cover imperfections, and create a smooth canvas for the rest of your makeup. Let’s delve into the techniques that will help you perfect your base makeup application.
Selecting the right foundation formula: liquid, powder, or cream
Choosing the right foundation formula is essential for achieving a natural-looking finish. The best foundation for you depends on your skin type, desired coverage, and personal preferences . Here’s a quick guide:
- Liquid foundation: Versatile and suitable for most skin types
- Powder foundation: Ideal for oily skin and quick touch-ups
- Cream foundation: Perfect for dry skin and full coverage
When selecting a foundation, always test the shade on your jawline in natural light to ensure a perfect match. Remember, your foundation should disappear into your skin, not create a visible mask.
Beauty blender vs. brush application techniques
The tool you use to apply your foundation can significantly impact the final result. Beauty blenders and brushes are two popular options, each with its own advantages:
Beauty Blender: This egg-shaped sponge is ideal for creating a natural, airbrushed finish. Dampen the sponge, squeeze out excess water, and use a bouncing motion to apply and blend foundation. This technique is particularly effective for achieving buildable coverage without cakiness.
Brush: Foundation brushes come in various shapes and densities. A flat-topped brush is excellent for buffing liquid or cream foundation into the skin for medium to full coverage. For a more natural finish, use a stippling brush with light, circular motions.
Experiment with both tools to find which one gives you the desired finish and feels most comfortable to use.
Concealer triangulation method for Under-Eye brightening
The concealer triangulation method is a professional technique for brightening the under-eye area and creating a lifted appearance. Here’s how to do it:
- Apply concealer in an inverted triangle shape under your eyes
- Extend the triangle down towards your cheeks
- Blend the edges gently with a beauty blender or brush
- Set with a light dusting of translucent powder
This technique not only covers dark circles but also creates a subtle highlight that brightens and lifts the entire eye area. Choose a concealer that’s one or two shades lighter than your foundation for an optimal brightening effect.
Setting makeup with translucent powder and setting spray
Setting your makeup is crucial for longevity and a polished finish. Translucent powder helps to control shine and set liquid or cream products, while setting spray locks everything in place and can add a dewy or matte finish depending on the formula.
To set your makeup:
- Apply a light layer of translucent powder with a fluffy brush, focusing on areas prone to oiliness
- Allow the powder to sit for a few minutes (a technique called « baking ») before gently dusting off the excess
- Finish with a few spritzes of setting spray, holding the bottle about 8 inches from your face
This two-step setting process ensures your makeup stays fresh and flawless throughout the day, resisting creasing, fading, and shine.
Eye makeup techniques for beginners
Eye makeup can be intimidating for beginners, but with the right techniques and practice, you can create stunning looks that enhance your natural beauty. Let’s explore some essential eye makeup techniques that every beginner should master.
Eyeshadow primer application for Long-Lasting color
Eyeshadow primer is a game-changer for creating long-lasting, vibrant eye looks. This product creates a smooth base for eyeshadow application and prevents creasing and fading. To apply eyeshadow primer:
- Dot a small amount of primer onto your eyelids
- Blend gently with your finger or a small brush
- Allow the primer to set for a minute before applying eyeshadow
Using an eyeshadow primer can significantly extend the wear time of your eye makeup , keeping your look fresh from morning to night.
Three-shade eyeshadow blending method
The three-shade eyeshadow method is a foolproof technique for creating a balanced, dimensional eye look. Here’s how to do it:
- Apply a light shade all over the lid as a base
- Use a medium shade in the crease and outer corner of the eye
- Add a dark shade to the outer V of the eye for depth
- Blend thoroughly between each step for a seamless transition
This technique works with any color palette and can be adapted for both natural and dramatic looks. The key to successful eyeshadow application is blending, blending, and more blending .
Winged eyeliner application using tape guide
Achieving the perfect winged eyeliner can be challenging, but using a tape guide can make the process much easier. Here’s how:
- Place a small piece of scotch tape from the outer corner of your eye towards your temple
- Apply your eyeliner along your lash line
- Use the tape as a guide to create the wing
- Remove the tape carefully to reveal a crisp, clean wing
With practice, you’ll be able to create perfect wings without the tape guide. Remember, eyeliner doesn’t have to be perfect – slight imperfections can add character to your look .
Mascara application tricks for volume and length
Mascara is the finishing touch that can make your eyes pop. Here are some tips for achieving voluminous, lengthened lashes:
- Curl your lashes before applying mascara
- Wiggle the wand at the base of your lashes to deposit more product
- Pull the wand through to the tips in a zigzag motion
- Apply a second coat for added drama, focusing on the outer lashes
For the most natural-looking lashes, choose a mascara with a brush that suits your lash type . Smaller brushes are great for short or sparse lashes, while larger brushes work well for those with already full lashes.
Contouring and highlighting for face definition
Contouring and highlighting are powerful techniques that can sculpt and define your facial features. While these techniques can seem intimidating at first, with practice, they can become an essential part of your makeup routine.
To contour, use a matte powder or cream product that’s 1-2 shades darker than your skin tone. Apply this to areas you want to recede or define, such as under your cheekbones, along your jawline, and on the sides of your nose. Blend thoroughly for a natural shadow effect.
For highlighting, choose a product that’s 1-2 shades lighter than your skin tone with a slight shimmer. Apply this to the high points of your face: the tops of your cheekbones, down the center of your nose, on your cupid’s bow, and in the center of your forehead.
The key to successful contouring and highlighting is blending . Use a clean, fluffy brush to soften any harsh lines and create a seamless transition between the contour, highlight, and your natural skin tone.
Lip color application and Long-Wear techniques
The final touch to any makeup look is often lip color. Whether you prefer a bold red or a subtle nude, proper application techniques can ensure your lip color stays put and looks flawless all day.
Start by exfoliating your lips to create a smooth canvas. Apply a lip balm and allow it to absorb before moving on to color application. For longer-lasting color, follow these steps:
- Line your lips with a lip liner that matches your lipstick shade
- Fill in your lips with the liner to create a base
- Apply lipstick directly from the tube or with a lip brush
- Blot with a tissue and apply a second layer for intensity
- Set with a light dusting of translucent powder for extended wear
For a more natural look, try the « blotted lip » technique . Apply lipstick to the center of your lips and use your finger to blend it outwards, creating a soft, diffused effect.
Remember, makeup application is an art form that requires practice and patience. Don’t be discouraged if your first attempts don’t turn out perfectly. With time and experience, you’ll develop the skills to create stunning looks that enhance your natural beauty and boost your confidence.